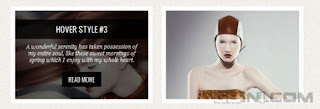
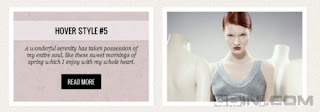
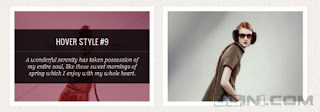
2011年最新使用CSS3实现各种独特悬浮效果的教程
From Evernote: |
2011年最新使用CSS3实现各种独特悬浮效果的教程Clipped from: http://www.gbin1.com/technology/css/20111103original-hover-effects-with-css3/index.html |
友情提示:因为使用CSS3,所以大家请使用支持CSS3的现代浏览器比如,Safari来查看演示,否则,你看到的所有的演示的行为都一样。
HTML
首先我们构建一个view的容器,然后将需要的元素都放入view,如下<div class="view">
<img src="image.gif" />
<div class="mask">
<h2>Title</h2>
<p>Your Text</p>
<a href="#" class="info">Read More</a>
</div>
</div>
CSS
以下我们定义了所有演示中共同使用的CSS定义:.view {
width: 300px;
height: 200px;
margin: 10px;
float: left;
border: 10px solid #fff;
overflow: hidden;
position: relative;
text-align: center;
box-shadow: 1px 1px 2px #e6e6e6;
cursor: default;
background: #fff url(../images/bgimg.jpg) no-repeat center center
}
.view .mask, .view .content {
width: 300px;
height: 200px;
position: absolute;
overflow: hidden;
top: 0;
left: 0
}
.view img {
display: block;
position: relative
}
.view h2 {
text-transform: uppercase;
color: #fff;
text-align: center;
position: relative;
font-size: 17px;
padding: 10px;
background: rgba(0, 0, 0, 0.8);
margin: 20px 0 0 0
}
.view p {
font-family: Georgia, serif;
font-style: italic;
font-size: 12px;
position: relative;
color: #fff;
padding: 10px 20px 20px;
text-align: center
}
.view a.info {
display: inline-block;
text-decoration: none;
padding: 7px 14px;
background: #000;
color: #fff;
text-transform: uppercase;
box-shadow: 0 0 1px #000
}
.view a.info:hover {
box-shadow: 0 0 5px #000
} 以上CSS和HTML定义完成后,我们进入正题,我们将使用CSS3定义每一个演示不同的展示行为。演示1
添加一个class定义view-first,这里我们将结合view定义来产生特效,加入HTML标签中。 类似这个定义,以下的其它演示将使用view-second,view-third, view-four来依次定义。
<div class="view view-first">

</div>

以下是第一个例子中transition的基本CSS3定义:

.view-first img {
    transition: all 0.2s linear;
}
.view-first .mask {
    opacity: 0;
    background-color: rgba(219,127,8, 0.7);
    transition: all 0.4s ease-in-out;
}
.view-first h2 {
    transform: translateY(-100px);
    opacity: 0;
    transition: all 0.2s ease-in-out;
}
.view-first p {
    transform: translateY(100px);
    opacity: 0;
    transition: all 0.2s linear;
}
.view-first a.info{
    opacity: 0;
    transition: all 0.2s ease-in-out;
}
下面我们将介绍核心代码。当你将鼠标悬浮在图片上方时,你可以使用delay属性来模拟简单动画效果。这个例子中我们没有在正常class定义中加入transition-delay, 而是在hover中加入定义。这样当鼠标移出时,延缓效果就会被执行。
.view-first:hover img {
    transform: scale(1.1);
}
.view-first:hover .mask {
    opacity: 1;
}
.view-first:hover h2,
.view-first:hover p,
.view-first:hover a.info {
    opacity: 1;
    transform: translateY(0px);
}
.view-first:hover p {
    transition-delay: 0.1s;
}
.view-first:hover a.info {
    transition-delay: 0.2s;
}
演示2
第二演示我中我们将加入特别的view-second定义。并且修改代码如下:
<div class="view view-second">
    <img src="images/5.jpg" />
    <div class="mask"></div>
    <div class="content">
        <h2>Hover Style #2</h2>
        <p>Some description</p>
        <a href="#" class="info">Read More</a>
    </div>
</div>
这里我们将定义mask的class来满足我们需求,我们将应用tranform属性来产生一个方形。如下:
.view-second img {
    transition: all 0.2s ease-in;
}
.view-second .mask {
    background-color: rgba(115,146,184, 0.7);
    width: 300px;
    padding: 60px;
    height: 300px;
    opacity: 0;
    transform: translate(265px, 145px) rotate(45deg);
    transition: all 0.2s ease-in-out;
}
.view-second h2 {
    border-bottom: 1px solid rgba(0, 0, 0, 0.3);
    background: transparent;
    margin: 20px 40px 0px 40px;
    transform: translate(200px, -200px);
    transition: all 0.2s ease-in-out;
}
.view-second p {
    transform: translate(-200px, 200px);
    transition: all 0.2s ease-in-out;
}
.view-second a.info {
    transform: translate(0px, 100px);
    transition: all 0.2s 0.1s ease-in-out;
}
这里我们使用translate 变形方式来移动我们的元素。 并且让mask旋转。这样descrption中的信息每一个都会延缓一会儿。
.view-second:hover .mask {
    opacity:1;
    transform: translate(-80px, -125px) rotate(45deg);
}
.view-second:hover h2 {
    transform: translate(0px,0px);
    transition-delay: 0.3s;
}
.view-second:hover p {
    transform: translate(0px,0px);
    transition-delay: 0.4s;
}
.view-second:hover a.info {
    transform: translate(0px,0px);
    transition-delay: 0.5s;
}
演示3
这个演示中,我们将使用translate和roate变形方式来显示我们的内容:
.view-third img {
    transition: all 0.2s ease-in;
}
.view-third .mask {
    background-color: rgba(0,0,0,0.6);
    opacity: 0;
    transform: translate(460px, -100px) rotate(180deg);
    transition: all 0.2s 0.4s ease-in-out;
}
.view-third h2{
    transform: translateY(-100px);
    transition: all 0.2s ease-in-out;
}
.view-third p {
    transform: translateX(300px) rotate(90deg);
    transition: all 0.2s ease-in-out;
}
.view-third a.info {
    transform: translateY(-200px);
    transition: all 0.2s ease-in-out;
}
这里有很简单的指导来应用于悬浮。我们将通过使用transition-delay来使description元素出现的逆向过程来展示。
.view-third:hover .mask {
    opacity:1;
    transition-delay: 0s;
    transform: translate(0px, 0px);
}
.view-third:hover h2 {
    transform: translateY(0px);
    transition-delay: 0.5s;
}
.view-third:hover p    {
    transform: translateX(0px) rotate(0deg);
    transition-delay: 0.4s;
}
.view-third:hover a.info {
    transform: translateY(0px);
    transition-delay: 0.3s;
}
演示4
第四个演示中,我们将执行一个旋转的缩放效果。使用scale变形来实现。如下:
.view-fourth img {
    transition: all 0.4s ease-in-out 0.2s;
    opacity: 1;
}
.view-fourth .mask {
    background-color: rgba(0,0,0,0.8);
    opacity: 0;
    transform: scale(0) rotate(-180deg);
    transition: all 0.4s ease-in;
    border-radius: 0px;
}
.view-fourth h2{
    opacity: 0;
    border-bottom: 1px solid rgba(0, 0, 0, 0.3);
    background: transparent;
    margin: 20px 40px 0px 40px;
    transition: all 0.5s ease-in-out;
}
.view-fourth p {
    opacity: 0;
    transition: all 0.5s ease-in-out;
}
.view-fourth a.info {
    opacity: 0;
    transition: all 0.5s ease-in-out;
}
这里有简单说明来实现效果,使用CSS3你什么都可以实现 , :)
.view-fourth:hover .mask {
    opacity: 1;
    transform: scale(1) rotate(0deg);
    transition-delay: 0.2s;
}
.view-fourth:hover img       {
    transform: scale(0);
    opacity: 0;
    transition-delay: 0s;
}
.view-fourth:hover h2,
.view-fourth:hover p,
.view-fourth:hover a.info{
    opacity: 1;
    transition-delay: 0.5s;
}
演示5
第五个演示中,我们使用translate及其ease-in-out方式来从左边幻灯展示内容
.view-fifth img {
    transition: all 0.3s ease-in-out;
}
.view-fifth .mask {
    background-color: rgba(146,96,91,0.3);
    transform: translateX(-300px);
    opacity: 1;
    transition: all 0.4s ease-in-out;
}
.view-fifth h2{
    background: rgba(255, 255, 255, 0.5);
    color: #000;
    box-shadow: 0px 1px 3px rgba(159, 141, 140, 0.5);
}
.view-fifth p{
    opacity: 0;
    color: #333;
    transition: all 0.2s linear;
}
这个悬浮效果将让图片从右边飞出,description内容从左边进入
.view-fifth:hover .mask {
    transform: translateX(0px);
}
.view-fifth:hover img {
    transform: translateX(300px);
    transition-delay: 0.1s;
}
.view-fifth:hover p{
    opacity: 1;
    transition-delay: 0.4s;
}
演示6
这个演示中我们将让description内容从正前方出来,缩小到原来大小。信息按钮将从低端显示
.view-sixth img {
    transition: all 0.4s ease-in-out 0.5s;
}
.view-sixth .mask{
    background-color: rgba(146,96,91,0.5);
    opacity:0;
    transition: all 0.3s ease-in 0.4s;
}
.view-sixth h2{
    opacity:0;
    border-bottom: 1px solid rgba(0, 0, 0, 0.3);
    background: transparent;
    margin: 20px 40px 0px 40px;
    transform: scale(10);
    transition: all 0.3s ease-in-out 0.1s;
}
.view-sixth p {
    opacity:0;
    transform: scale(10);
    transition: all 0.3s ease-in-out 0.2s;
}
.view-sixth a.info {
    opacity:0;
    transform: translateY(100px);
    transition: all 0.3s ease-in-out 0.1s;
}
反向的transition将延迟以偏让显示过程流畅
.view-sixth:hover .mask {
    opacity:1;
    transition-delay: 0s;
}
.view-sixth:hover img {
    transition-delay: 0s;
}
.view-sixth:hover h2 {
    opacity: 1;
    transform: scale(1);
    transition-delay: 0.1s;
}
.view-sixth:hover p {
    opacity:1;
    transform: scale(1);
    transition-delay: 0.2s;
}
.view-sixth:hover a.info {
    opacity:1;
    transform: translateY(0px);
    transition-delay: 0.3s;
}
演示7
这个演示将让图片旋转并且缩小。然后description内容将旋转出现。
.view-seventh img{
    transition: all 0.5s ease-out;
    opacity: 1;
}
.view-seventh .mask {
    background-color: rgba(77,44,35,0.5);
    transform: rotate(0deg) scale(1);
    opacity: 0;
    transition: all 0.3s ease-out;
    transform: translateY(-200px) rotate(180deg);
}
.view-seventh h2{
    transform: translateY(-200px);
    transition: all 0.2s ease-in-out;
}
.view-seventh p {
    transform: translateY(-200px);
    transition: all 0.2s ease-in-out;
}
.view-seventh a.info {
    transform: translateY(-200px);
    transition:  all 0.2s ease-in-out;
}
悬浮时我们为description元素添加一个延迟。这将会先显示旋转图片,然后description信息会从图片中出现。在逆向变化中,所有元素都立刻出现,我们可以看到图片复原。
.view-seventh:hover img{
    transform: rotate(720deg) scale(0);
    opacity: 0;
}
.view-seventh:hover .mask {
    opacity: 1;
    transform: translateY(0px) rotate(0deg);
    transition-delay: 0.4s;
}
.view-seventh:hover h2 {
    transform: translateY(0px);
    transition-delay: 0.7s;
}
.view-seventh:hover p {
    transform: translateY(0px);
    transition-delay: 0.6s;
}
.view-seventh:hover a.info {
    transform: translateY(0px);
    transition-delay: 0.5s;
}
演示8
.view-eighth .mask {
    background-color: rgba(255, 255, 255, 0.7);
    top: -200px;
    opacity: 0;
    transition: all 0.3s ease-out 0.5s;
}
.view-eighth h2{
    transform: translateY(-200px);
    transition: all 0.2s ease-in-out 0.1s;
}
.view-eighth p {
    color: #333;
    transform: translateY(-200px);
    transition: all 0.2s ease-in-out 0.2s;
}
.view-eighth a.info {
    transform: translateY(-200px);
    transition:  all 0.2s ease-in-out 0.3s;
}

我们添加动画到mask元素并且定义合适的延迟给description元素

.view-eighth:hover .mask {
    opacity: 1;
    top: 0px;
    transition-delay: 0s;
    animation: bounceY 0.9s linear;
}
.view-eighth:hover h2 {
    transform: translateY(0px);
    transition-delay: 0.4s;
}
.view-eighth:hover p {
    transform: translateY(0px);
    transition-delay: 0.2s;
}
.view-eighth:hover a.info {
    transform: translateY(0px);
    transition-delay: 0s;
}
演示9
这个演示中我们使用俩个mask元素来实现幻灯右下和左上进入效果
<div class="view view-ninth">
    <img src="images/11.jpg" />
    <div class="mask mask-1"></div>
    <div class="mask mask-2"></div>
    <div class="content">
        <h2>Hover Style #9</h2>
        <p>Some Text</p>
        <a href="#" class="info">Read More</a>
    </div>
</div>
俩个mask将使用不同的transition和tranform。将一个设置到顶端,另外一个设置到底端。
.view-ninth .mask-1,
.view-ninth .mask-2{
    background-color: rgba(0,0,0,0.5);
    height: 361px;
    width: 361px;
    background: rgba(119,0,36,0.5);
    opacity: 1;
    transition: all 0.3s ease-in-out 0.6s;
}
.view-ninth .mask-1 {
    left: auto;
    right: 0px;
    transform: rotate(56.5deg) translateX(-180px);
    transform-origin: 100% 0%;
}
.view-ninth .mask-2 {
    top: auto;
    bottom: 0px;
    transform: rotate(56.5deg) translateX(180px);
    transform-origin: 0% 100%;
}
内容将设置让它感觉出现于俩个mask接触的边缘
.view-ninth .content{
    background: rgba(0,0,0,0.9);
    height: 0px;
    opacity: 0.5;
    width: 361px;
    overflow: hidden;
    transform: rotate(-33.5deg) translate(-112px,166px);
    transform-origin: 0% 100%;
    transition: all 0.4s ease-in-out 0.3s;
}
.view-ninth h2{
    background: transparent;
    margin-top: 5px;
    border-bottom: 1px solid rgba(255,255,255,0.2);
}
.view-ninth a.info{
    display: none;
}
悬浮时,我们将内容从开缝中取出,并且使mask接触边缘
.view-ninth:hover .content{
    height: 120px;
    width: 300px;
    opacity: 0.9;
    top: 40px;
    transform: rotate(0deg) translate(0px,0px);
}
.view-ninth:hover .mask-1,
.view-ninth:hover .mask-2{
    transition-delay: 0s;
}
.view-ninth:hover .mask-1{
    transform: rotate(56.5deg) translateX(1px);
}
.view-ninth:hover .mask-2 {
    transform: rotate(56.5deg) translateX(-1px);
}
演示10
最后一个演示,我们将放大图片,然后淡出,然后把description显示到前端。我们可以使用scale transform和opacity。
.view-tenth img {
    transform: scaleY(1);
    transition: all 0.7s ease-in-out;
}
.view-tenth .mask {
    background-color: rgba(255, 231, 179, 0.3);
    transition: all 0.5s linear;
    opacity: 0;
}
.view-tenth h2{
    border-bottom: 1px solid rgba(0, 0, 0, 0.3);
    background: transparent;
    margin: 20px 40px 0px 40px;
    transform: scale(0);
    color: #333;
    transition: all 0.5s linear;
    opacity: 0;
}
.view-tenth p {
    color: #333;
    opacity: 0;
    transform: scale(0);
    transition: all 0.5s linear;
}
.view-tenth a.info {
    opacity: 0;
    transform: scale(0);
    transition: all 0.5s linear;
}
悬浮时,我们简单的放大图片然后通过设置opacity为0实现淡出效果
.view-tenth:hover img {
    transform: scale(10);
    opacity: 0;
}
.view-tenth:hover .mask {
    opacity: 1;
}
.view-tenth:hover h2,
.view-tenth:hover p,
.view-tenth:hover a.info{
    transform: scale(1);
    opacity: 1;
}
总结
希望大家能喜欢CSS3开发的巨大潜力。很快我们就可以避免使用javascript来实现复杂的特效了。希望这篇文章能给你web开发带来灵感原文来自: 2011年最新使用CSS3实现各种独特悬浮效果的教程


0 评论 :
发表评论